Installing and Customizing Patterns in Adobe Illustrator: A Guide
How to Install and Customize a Downloaded Pattern Library in Adobe Illustrator
As a student, architect or interior designer, you know how textures and patterns bring life to your designs. Adobe Illustrator allows you to add custom pattern libraries, enabling you to apply textures like wood, concrete, or brick directly to your drawings. This guide will walk you through installing, editing, scaling, and using these pattern libraries in a simple, step-by-step format, with details for both Mac and Windows users.
Part 1: Installing a Pattern Library
Quick Overview
To install a pattern library in Illustrator:
- Download and unzip the library file.
- Load it into Illustrator via the Swatches panel.
Detailed Steps
-
Download Your Pattern Library:
- Locate your downloaded .zip file in the "Downloads" folder.
-
Unzip the file:
- On Windows: Right-click the file and select "Extract Here."
- On Mac: Double-click the file to automatically unzip it.
-
Locate the Pattern Files:
- After unzipping, find the .ai file(s) (Adobe Illustrator files) containing the pattern library.
-
Open Adobe Illustrator:
- Start Illustrator. Ideally, use a recent version for better compatibility.
-
Open the Swatches Panel:
- Go to Window > Swatches to open your Swatches panel.
-
Load the Pattern Library:
- In the Swatches panel, click on the Library icon (bottom-left corner).
- Select Open Swatch Library > Other Library.
- Locate your downloaded .ai file and click Open. The pattern library will load in a new panel.
-
Optional - Save for Easy Access:
- To make this library part of your default workspace, drag patterns from the library panel into your main Swatches panel.
- This ensures they’ll be available each time you open Illustrator.
-
Apply Patterns to Your Design:
- Select any object, then click a pattern in the Swatches panel to apply it.

Part 2: Changing the Color of Vector Patterns
-
Select the Object with the Pattern Applied:
- Click on the object you want to edit.
- Shortcut: Press V to activate the Selection tool.
-
Enter Pattern Editing Mode:
- Double-click the pattern swatch in the Swatches panel.
-
Select the Elements to Color-Edit:
- Use the Direct Selection Tool to pick the elements in the pattern you want to change.
- Shortcut: Press A for the Direct Selection Tool.
-
Adjust the Color:
- Open the Color panel and pick your new color.
- Shortcut: Press F6 to quickly access the Color panel.
-
Save Your Color Changes:
- Click Done at the top to save. Press Esc to cancel if needed.
Part 3: Changing the Thickness of Vector Patterns
-
Select the Object with the Pattern:
- Click on the object containing the pattern.
- Shortcut: Press V to select.
-
Enter Pattern Editing Mode:
- Double-click the pattern swatch in the Swatches panel to edit.
-
Select the Pattern’s Strokes:
- Use the Direct Selection Tool to highlight the lines or strokes to edit.
- Shortcut: Press A for the Direct Selection Tool.
-
Change Stroke Thickness:
- Go to the Stroke panel and adjust the Weight.
- Shortcut: Ctrl + F10 (Windows) or Cmd + F10 (Mac).
-
Save the Thickness Adjustments:
- Click Done to save changes. Use Esc to cancel if needed.

Part 4: Scaling a Pattern
-
Select the Object with the Pattern Applied:
- Click on the object filled with the pattern that you wish to scale.
- Shortcut: Press V to activate the Selection tool.
-
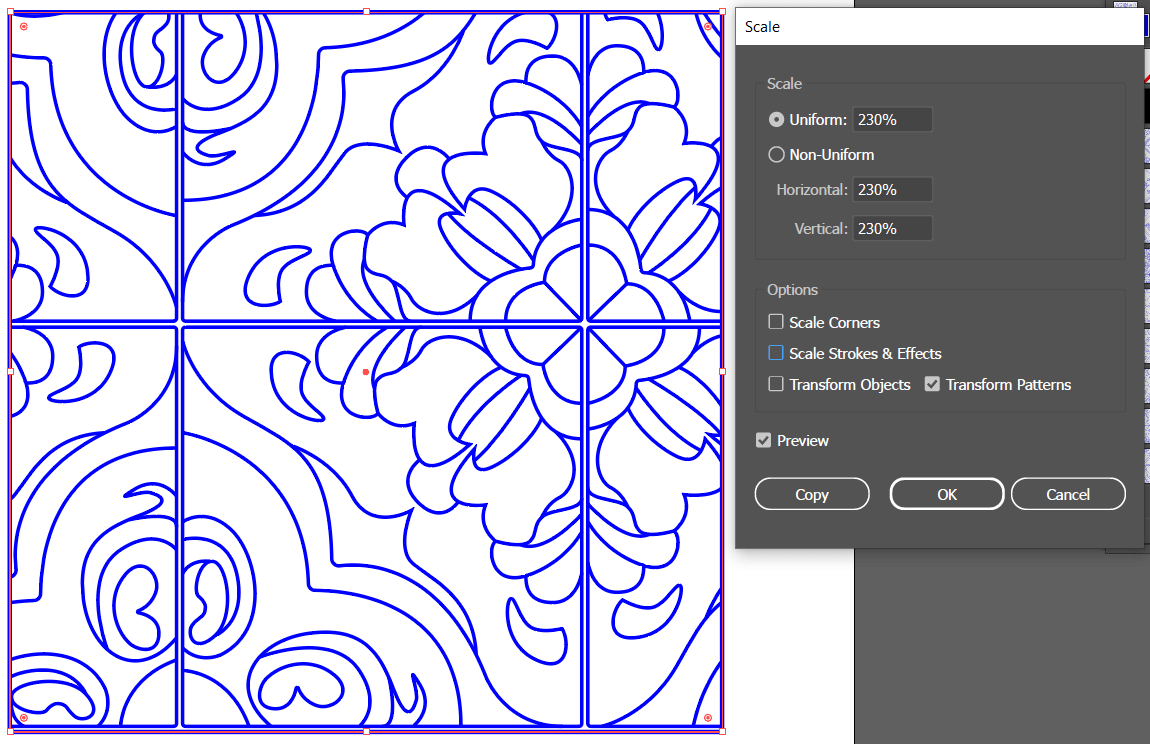
Open the Scale Dialog Box:
- With your object selected, go to Object > Transform > Scale.
- Shortcut: Press S and then hit Enter to bring up the Scale options.
-
Separate Pattern Scaling from Object Scaling:
- In the Scale dialog, uncheck "Transform Objects" and check "Transform Patterns" only. This setting will resize the pattern inside the object without changing the object’s dimensions.
-
Adjust the Pattern Scale:
- Enter the desired scale percentage for the pattern (e.g., 50% to reduce size, 200% to enlarge).
- Click OK to apply the scaling.
-
Preview and Adjust Further if Needed:
- Check the object to see if the pattern scale looks right. If not, repeat the steps to make further adjustments.

Check out our patterns HERE

2 Comments
Official Invoice?
I just purchased your Wood Swatch patterns hoping that I could convert them to use as hatches in Autocad. Do you know any way of making this work? Even if I could export the swatch vectors I could then make a custom hatch pattern in Autocad but I am having trouble doing this too. Let me know – thanks!